How to install the app on iOS
Follow along with the video below to see how to install our site as a web app on your home screen.
Note: This feature may not be available in some browsers.
You are using an out of date browser. It may not display this or other websites correctly.
You should upgrade or use an alternative browser.
You should upgrade or use an alternative browser.
StanF South Bend 9A Rebuild Thread
- Thread starter StanF
- Start date
- Replies 184
- Views 6,586
More finishing stuff...I'm going to go ahead and clean and paint these pieces this weekend.
(I've got the collet drawbar too, but it didn't make it into the picture.)
And I still need to make the bracket in order to use the 10K reverse lever. But at least the reverse lever will be the correct color.
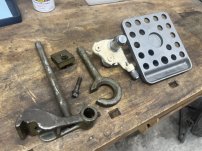
(I've got the collet drawbar too, but it didn't make it into the picture.)
And I still need to make the bracket in order to use the 10K reverse lever. But at least the reverse lever will be the correct color.

mattthemuppet
Stainless
- Joined
- Apr 22, 2016
- Location
- San Antonio
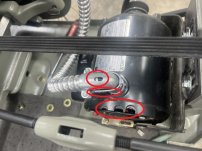
Looking good! As above, don’t block off the motor openings, you’ll cook your motor. Make some kind of shroud out of sheet metal to deflect the chips instead.
I made a little catch pan for the forward/ reverse gears to direct the oil drips into the chip tray, then put some folded up paper towel under it. Easy to replace.
For your F and R letters on the drum switch, an alternative to painting them would be to use some sand paper wrapped around a piece of flat would and sand them back to metal. You’d get some good contrast
4GSR
Diamond
- Joined
- Jan 25, 2005
- Location
- Victoria, Texas, USA
Place a piece of duck tape over the openings. Better yet, use the metal backing tape HAVC people use on duct work.
4GSR
Diamond
- Joined
- Jan 25, 2005
- Location
- Victoria, Texas, USA
Those holes were originally for running STJ, STO or SO cord through. Not so much for cooling.
Last edited:
mattthemuppet
Stainless
- Joined
- Apr 22, 2016
- Location
- San Antonio
Black electricians tape is what I would use
Collet Rack Mounted...I'm not sure that I love it, so we'll see how it goes. Later, I may decide to store the collet kit in the drawers.
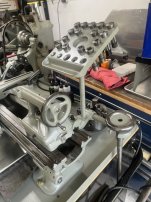
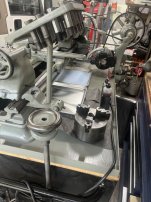
The closer handwheel is from "The Lathe Chuck and Tool Company", so I don't think it is a South Bend factory part.
Is the tapped hole for setting a length stop rod inside the tube?
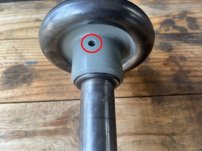
I like using collets where possible. My previous Logan 11" used 5C collets, and they were awesome. We'll see if the 3C collets are as useful.


The closer handwheel is from "The Lathe Chuck and Tool Company", so I don't think it is a South Bend factory part.
Is the tapped hole for setting a length stop rod inside the tube?

I like using collets where possible. My previous Logan 11" used 5C collets, and they were awesome. We'll see if the 3C collets are as useful.
4GSR
Diamond
- Joined
- Jan 25, 2005
- Location
- Victoria, Texas, USA
I'm not much on hanging my collets in the open like this. I prefer to store them in a rack placed in a drawer when possible. Sadly, they set on a shelf in house to keep them from the elements of the shop and they still get dusty. I DO like the old school collet racks SBL used to use. A rack would be too big to store roughly 35 3-C collets on the lathe. I think the original intent was for the rack to hold those sizes frequently used even though I believe it will hold a set in 1/32" increments up to 1/2" in size.
I made a collet draw bar for my lathe similar to a original SBL one. I've used mine for making small brass pins I use for machine rebuilding projects.
I made a collet draw bar for my lathe similar to a original SBL one. I've used mine for making small brass pins I use for machine rebuilding projects.
M.B. Naegle
Diamond
- Joined
- Feb 7, 2011
- Location
- Conroe, TX USA
3C collets are plenty capable in my experience. Only drawback is their sizes are limited to 1/2" or less, whereas 5C is 1" or less. Both collet systems have even bigger collets available, but the gripping part of the jaws are out away from the taper so they don't grip those sizes as well and are best for light trim work. I've got a bunch of the extended size 3C collets for my 9" and even some that are big Pie-jaw type, but they are not deep enough for holding onto anything over 1/2" wide. The 9" SB's spindle bore won't take more than 3/4" though so bigger collets are not as necessary I think. 3C is a little less common than 5C, but not impossible to find.
I had a rack like that that I used on my old Logan 820 with a set of 3AT collets. It was actually a South Bend set that had had the tube length modified to fit the Logan. The rack is handy, but just for the collets you're using all the time and not for general storage. I like the way Hendey did theirs. It was a raised rack like the SB that mounts to the bed, but the rack and draw tube parts were contained in a wood chest so no chips or dirt could muck them up.
I got a couple of *these* PVC collet racks for mine off eBay and have been pleased, keeping them in a drawer under my lathe, but someday might replace them with something made from aluminum or hardwood. Mine has the lever action closer so the bed rack wouldn't play well with it anyway. Collets are one of those things you'll never have enough of. There's always a 64th size you need to add, or a hex or square bore. I've got emergency collets that have been re-cut till there's almost no material left, so time to get some more (but you know I'm keeping the old ones too "just in case").
jim rozen
Diamond
- Joined
- Feb 26, 2004
- Location
- peekskill, NY
The 5C go up as high as 1-1/8 diameter, caveat is the depth into the collet is limited for anything over about 1-1/32.
Some odds and ends...here's the drip tray under the QC gearbox - 3d printed in nylon:
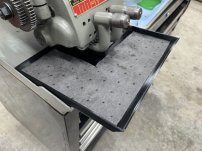
I'm very pleased with the fit
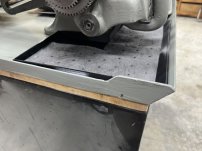
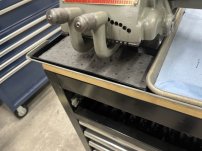
I used two half sheet aluminum cake pans as chip trays:
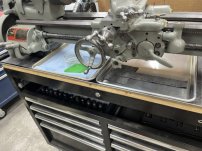
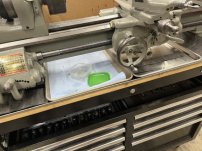
I lost a bunch of oil out of the apron, and it collected in the pans. I guess that is normal
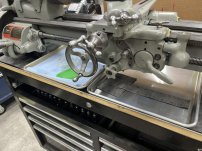
Coverage is pretty good - there's one gap at the end, but I will rarely be working on stock that long.
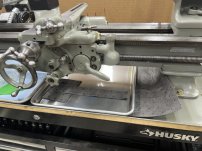
Wilton Vise Handle Bracket:
I also ordered some steel and started to finalize the design of the Wilton vise handle bracket that I mentioned a few weeks ago. It ended up as a 100% mill project. I did a 3d print in ABS, and I'm pretty happy with it.
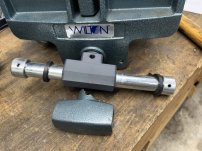
A 3d print of this wasn't necessary at all, but it was pretty quick and easy for such a small piece.
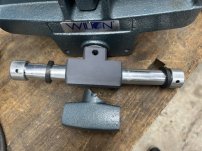
I have a full dimensioned drawing of it too, as I find it's easier to make good parts with a good drawing!
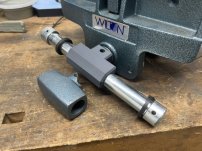

I'm very pleased with the fit


I used two half sheet aluminum cake pans as chip trays:


I lost a bunch of oil out of the apron, and it collected in the pans. I guess that is normal

Coverage is pretty good - there's one gap at the end, but I will rarely be working on stock that long.

Wilton Vise Handle Bracket:
I also ordered some steel and started to finalize the design of the Wilton vise handle bracket that I mentioned a few weeks ago. It ended up as a 100% mill project. I did a 3d print in ABS, and I'm pretty happy with it.

A 3d print of this wasn't necessary at all, but it was pretty quick and easy for such a small piece.

I have a full dimensioned drawing of it too, as I find it's easier to make good parts with a good drawing!

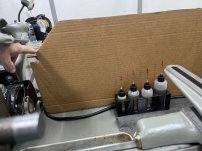
I also did some *CAD* work on the backsplash...*Cardboard Aided Design*
I know some of you hate this idea, and I'm not sure that I like it either. But I'm planning to try it out. I already have some .093 aluminum, and a press brake to make the bends. If I don't like it, I'll take it off. Constructive comments welcome!
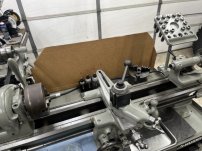
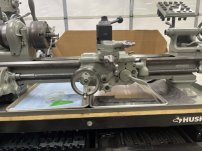
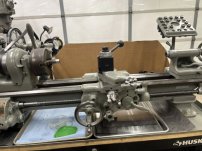
Bent flanges on both ends will make it more rigid. I'll consider mounting the lubrication tray that you see in this photo to the backsplash.
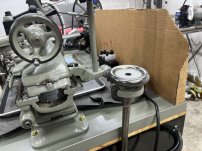
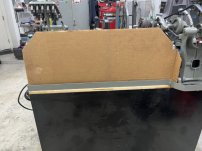
Notched around the horizontal drive unit. I may also mount a little motor shield bracket to the backsplash to better protect it from chips:
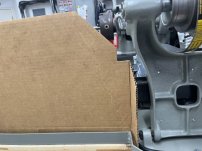
I may shorten it to about where my finger is located.
LED Light:
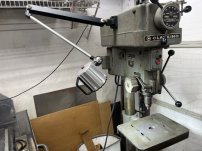
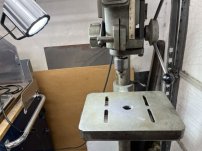
As I get older, I find that I need better light to see the finer details. I added an LED light to my drill press, and will likely do something similar to the lathe. And possibly mount it to the backsplash.
Can y'all post up any pictures/thoughts of your lathe lights?
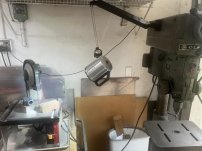
Here's my drill press light - (12 bulbs) purchased from Amazon:
I know some of you hate this idea, and I'm not sure that I like it either. But I'm planning to try it out. I already have some .093 aluminum, and a press brake to make the bends. If I don't like it, I'll take it off. Constructive comments welcome!


Bent flanges on both ends will make it more rigid. I'll consider mounting the lubrication tray that you see in this photo to the backsplash.


Notched around the horizontal drive unit. I may also mount a little motor shield bracket to the backsplash to better protect it from chips:

I may shorten it to about where my finger is located.

LED Light:
As I get older, I find that I need better light to see the finer details. I added an LED light to my drill press, and will likely do something similar to the lathe. And possibly mount it to the backsplash.
Can y'all post up any pictures/thoughts of your lathe lights?
Here's my drill press light - (12 bulbs) purchased from Amazon:


Last edited:
https://www.amazon.com/gp/product/B0BHSNSZB6I like the lite , do ya have a link for it ?
thanks
animal
It's not cheap, but it has worked out pretty well for me. We're also using two of the same ones at my office that I purchased. And all 3 have worked well.
When I was researching the options, I wanted more light. So I got the 12 bulb version, even though it was more expensive. There seem to be a bunch of options in the 7 bulb range. But fewer options in the 12 bulb range. Navigating the specifications to figure out the light output of the various options is difficult at best.
M.B. Naegle
Diamond
- Joined
- Feb 7, 2011
- Location
- Conroe, TX USA
Looking good! I think your back panel will work out nice. As long as you have access to everything and can easily clean out the space between the panel and the lathe, it's a worthwhile addition. I think extending it on the left is a good fix to keep chips and debris out of the motor too. There's going to be stuff that gets back there, but it'll help keep chips from potentially shooting directly into the motor.
And I agree a few drips are fine. As long as the apron oil isn't 'draining' over time, the old adage of "if there's no oil under it, there's no oil in it" for sure applies here.
I'm a little different on machine lights. Often for the light on the machine itself, I prefer direct spot lighting that can be moved around where you need it, like a sealed beam or halogen light, but often a small incandescent lamp is all I need as it's just illuminating the cutting area and I like to have a natural light that isn't "washing out" the area. If the work space needs better light, that's a different issue from the machine light IMO.
Last edited:
Steel for the Wilton bracket arrived:
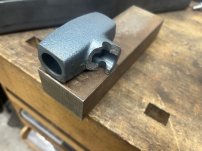
It's almost the perfect size blank:
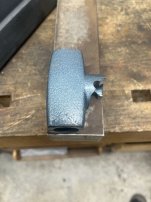
And was cut to length...slowly!
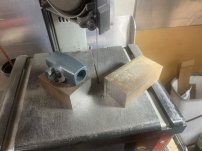
I used my Milwaukee bandsaw in a Swag stand, which is one of my favorite tools. I am typically using it for .06 to .25 steel for car stuff, but it works pretty well for thicker stuff too. Just go slow!
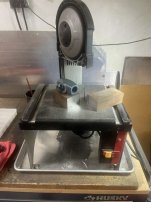
Providing light at the bandsaw is the same Drill Press LED light. That's one reason why I went with a light with such a long arm on it - I'll point the light at anything in range!
No pictures, but I also completely disassembled the Wilton vise, straightened a bent bracket, and greased everything up. It also let me clean out all the little Styrofoam bits clinging to everything.
Don't worry, I didn't forget to add lathe content!
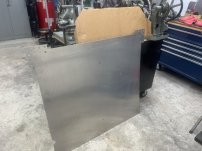
My newish truck*** has been in the body shop for hail damage repair for 3 weeks, but I managed to squeeze a large piece of aluminum into my 2 door Jeep for the backsplash.
(***My previous 2018 F150 was totaled because of hail in Jan 2024. That same month, I bought a used 2021 F150. 3 months later, my 2021 F150 got caught in another hail storm . And it'll be in the shop for 5 more weeks or so.)
I'm going to give this LED Light a try for the lathe:
https://www.amazon.com/Machine-Flexible-Waterproof-Lumens-110V-220V/dp/B0BFL92R88
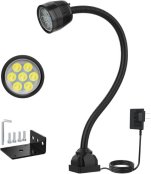
I like this because it's cheaper, and still has the switch on the head. I definitely didn't want a cord mounted switch. They make similar ones with a mag mount, but I think I'd rather screw it down. We'll see how it goes!

It's almost the perfect size blank:

And was cut to length...slowly!

I used my Milwaukee bandsaw in a Swag stand, which is one of my favorite tools. I am typically using it for .06 to .25 steel for car stuff, but it works pretty well for thicker stuff too. Just go slow!

Providing light at the bandsaw is the same Drill Press LED light. That's one reason why I went with a light with such a long arm on it - I'll point the light at anything in range!

No pictures, but I also completely disassembled the Wilton vise, straightened a bent bracket, and greased everything up. It also let me clean out all the little Styrofoam bits clinging to everything.
Don't worry, I didn't forget to add lathe content!
My newish truck*** has been in the body shop for hail damage repair for 3 weeks, but I managed to squeeze a large piece of aluminum into my 2 door Jeep for the backsplash.

(***My previous 2018 F150 was totaled because of hail in Jan 2024. That same month, I bought a used 2021 F150. 3 months later, my 2021 F150 got caught in another hail storm
I'm going to give this LED Light a try for the lathe:
https://www.amazon.com/Machine-Flexible-Waterproof-Lumens-110V-220V/dp/B0BFL92R88

I like this because it's cheaper, and still has the switch on the head. I definitely didn't want a cord mounted switch. They make similar ones with a mag mount, but I think I'd rather screw it down. We'll see how it goes!
Similar threads
- Replies
- 5
- Views
- 180


